Saturday, January 31, 2015

Set it and Forget It Food

I do love when a new project overtakes me- and it does overtake me, and my time, and my focus, and my kitchen. This time it started with fire cider. It was the easiest home remedy yet. Put all the ingredients, coarsley chopped, into a jar and cover with vinegar. I used garlic, onions, hot peppers, ginger, tumeric, horseradish, lemons and oranges. Steep a couple weeks, strain and viola! A ready made cold, flu, and general "need to feel better" tonic. I will warn you, this potion is spicy! Mix with raw honey 50/50 to make an easy to take syrup (mix with additional water for a drinkable version). I followed this recipe and added citrus: http://www.mommypotamus.com/fire-cider-recipe/ That, sadly, was the beginning of the end for me. One little concoction and I was finished. Caput. Finito. It led me to a facebook post on fermenting something, that led to a forum, that led to another, and yet another. Two weeks later, I have Kimchi, Sauerkraut, Beet Kvass, Ginger Bug, fermented garlic, water kefir, milk kefir, kombucha, and probiotic lemonade- all simmering away on my countertops. Some I use daily, like milk kefir in smoothies (or today in the fluffiest pancakes I have ever made!) and water kefir that makes the most awesome soda replacement, and beet kvass with kombucha is my midday beverage. The fire cider and honey and fermented garlic, plus gingered water kefir were the remedies we did for one that got sick in our family this week and it worked really well. Another awesome, and unexpected bonus, a swig of water kefir before bed has made my reflux disappear! Again, as always, I have to say that I am no medical expert, and I do not endorse these things as medical advice. I humbly share my experience and opinion that probiotic nutrition heals a body and addresses root causes for symptoms in some cases. Here are some pictures of the projects:
If you want to try your hand at fermenting- it's easy and got so much good probiotics in it for you, some items you will need are: Jars, airlocks (not necessary but helpful), coffee filters or tightly woven cloths and rubberbands, christmas lights (not led, and only if your house is especially cold), grolsch bottles (if you bottle water kefir, kombucha, or lemonade for carbonation effects- get these for $1 a box at redemption centers), starters (for shipping only on the boards below) and fresh ingredients! There are some facebook pages that are wonderful for helping a newbie get started and they are "Kombucha Nation,""Kefir Grains, Scoby and Others to Share," and "Fermenters Kitchen." If you want to make your own whey- it is another disgustingly easy feat. Take milk kefir (after straining the grains) or plain yogurt and place in a finely meshed strainer like the cheap one pictured below- find this hanging on a peg near coffee in grocery stores (reusable plastic coffee filter), and place in strainer over a mug or bowl. Let strain overnight on counter or in fridge. Whey collects in the mug/bowl and you have a cream cheese replacement in your strainer. I use mine in dips and on toast with jam or on baked potatoes. The longer the cheese sits, the sourer it gets.
Lastly, on my list of things that work, but set it and forget it, is the next time you make cookie dough, double or triple it, and scoop the rest onto a cookie sheet. Freeze these balls, and place into a freezer bag. Next time you need a dessert or gift in a hurry, you can place the frozen balls on a sheet and bake as usual. These were sugar cookies I didn't bother to flatten and drizzled with easy lemon glaze.

Tuesday, September 2, 2014

Free Money Management Ebook

I have been using CalendarBudget.com's free budgeting software for about a year now and I am not disappointed. I moved over to this one from my favorite 9.99 software Budgeting for Dummies that I used for YEARS before it finally stopped working with the newer computers. It was actually a struggle to keep my windows 98 computer just for this reason, I liked and used it so much. However, calendarbudget works just as well with the added uploadable bank transactions feature. However, I digress. When I went to sign in today, I found that they have a money management book for sale there and also saw that they give you the first 6 chapters in audio form for FREE! Feel free to visit them at http://powerspendingbook.com/advanced-power-spending/food-savings for info on the book and lots of other free resources (IE lifehacks) and get the free audio chapters here: http://powerspendingbook.com/advanced-power-spending/food-savings

Friday, May 16, 2014

New use for homemade toothpaste and repellent success!

On my facebook business page I mentioned how I insanely forgot to use my own repellent when out in the garden lightly raking for 30 minutes, and immediately got another tick bite;it was just like the one I wrestled with the effects over for months last summer. I was bummed and very angry with myself.
However, this weekend I was 2 days in the garden (read machete style, up-to-your-armpits in brush for 6 hours each day) WITH repellent and not one creepy crawly from my now famous Lyme yard; I was doubly impressed and immediately did a happy dance. Happy dance revealed my very disgusting hands and feet after a day of burying them in the sweet smelling soil, and soap was NOT getting out the ground in dirt; it was not going anywhere without a fight. I was about to head to the kitchen for some coffee grounds (which has had only partial success in the past) when I spied my fluoride free toothpaste sitting there. Since the baking soda and peroxide do such a great job cleaning my teeth, I scooped some out and scrubbed my hands. "Scrubbed" is actually a harsh term, because it all came off so easily and my hands were so SOFT! Another AHA moment in the Bilotta household. I will now keep an extra jar with my garden tools :) If you have not found a great recipe for either repellent or toothpaste yet, I have some ready to go at the Etsy shop link below :)

Friday, May 2, 2014

Etsy

I know many of you are familiar with the site, but are you familiar with selling on it? I recently put my handmade products in a shop, as a start to my business, and I wanted to test the Etsy culture. It was easy to set up, used my paypal account that I already had set up, and the options to offer coupons, discounts, and various mailing options made it fun to plan. I love the favorite sites that help me to get a glimpse of the world of Etsy, and the amazing artists that call it home. It is not an expensive option, compared to hosting my own site and cart. If you have a talent for making tangible items, no matter what they are made of or their function, consider spending an evening putting together a site for it, and you might just find those creative juices flowing again! See my store here.... Thingsthatwork Go for it! Start your own store here

Monday, March 31, 2014

Gel fireplace tools

Looking for better ways to do things with less money, sometimes takes ingenuity and a striking piece of luck.  I found how to make my own gel fuel in a previous post, saving 1/2 to 3/4 of the cost.  But to put those babies out, especially quickly, while meddling with a hot ceramic log in front of them, warm grate panels, and high flames, was more of a challenge.  I used my sister's idea of long handled pliers and the sterno tops to smother the flames, however, I am not as dexterous as she, it appears.  I dropped the tops to the side, back, and in between of the pots before I ever put a single one out- and that was in a moment of anxiousness because I lit 3 at once and the flames were dangerously high with all three going at once. I had an aha moment when I realized my wide mouth lids for canning offered much more surface area for both snuffing and holding.  However, I still was not great with the pliers; it felt much too clumsy if an emergency happened.  Looking online I found the real snuffers for gel fireplaces and was resigned that my ineptitude was going to put me out $20 for the sake of safety.  Being the procrastinator I am, I also didn't order it right away, and that was a blessing in disguise.  While gathering jars for my next home business project, I saw a neat little magnetic tool that was always on the shelf to lift lids out of boiling water. It turned out to be the perfect thing to pair with the large lids for snuffing needs, which is rare now that we usually shed a tear when the fire burns itself out on its own.  The best part?  It cost me all of 98 cents!  WOO HOO.  I love a deal!

Saturday, March 8, 2014

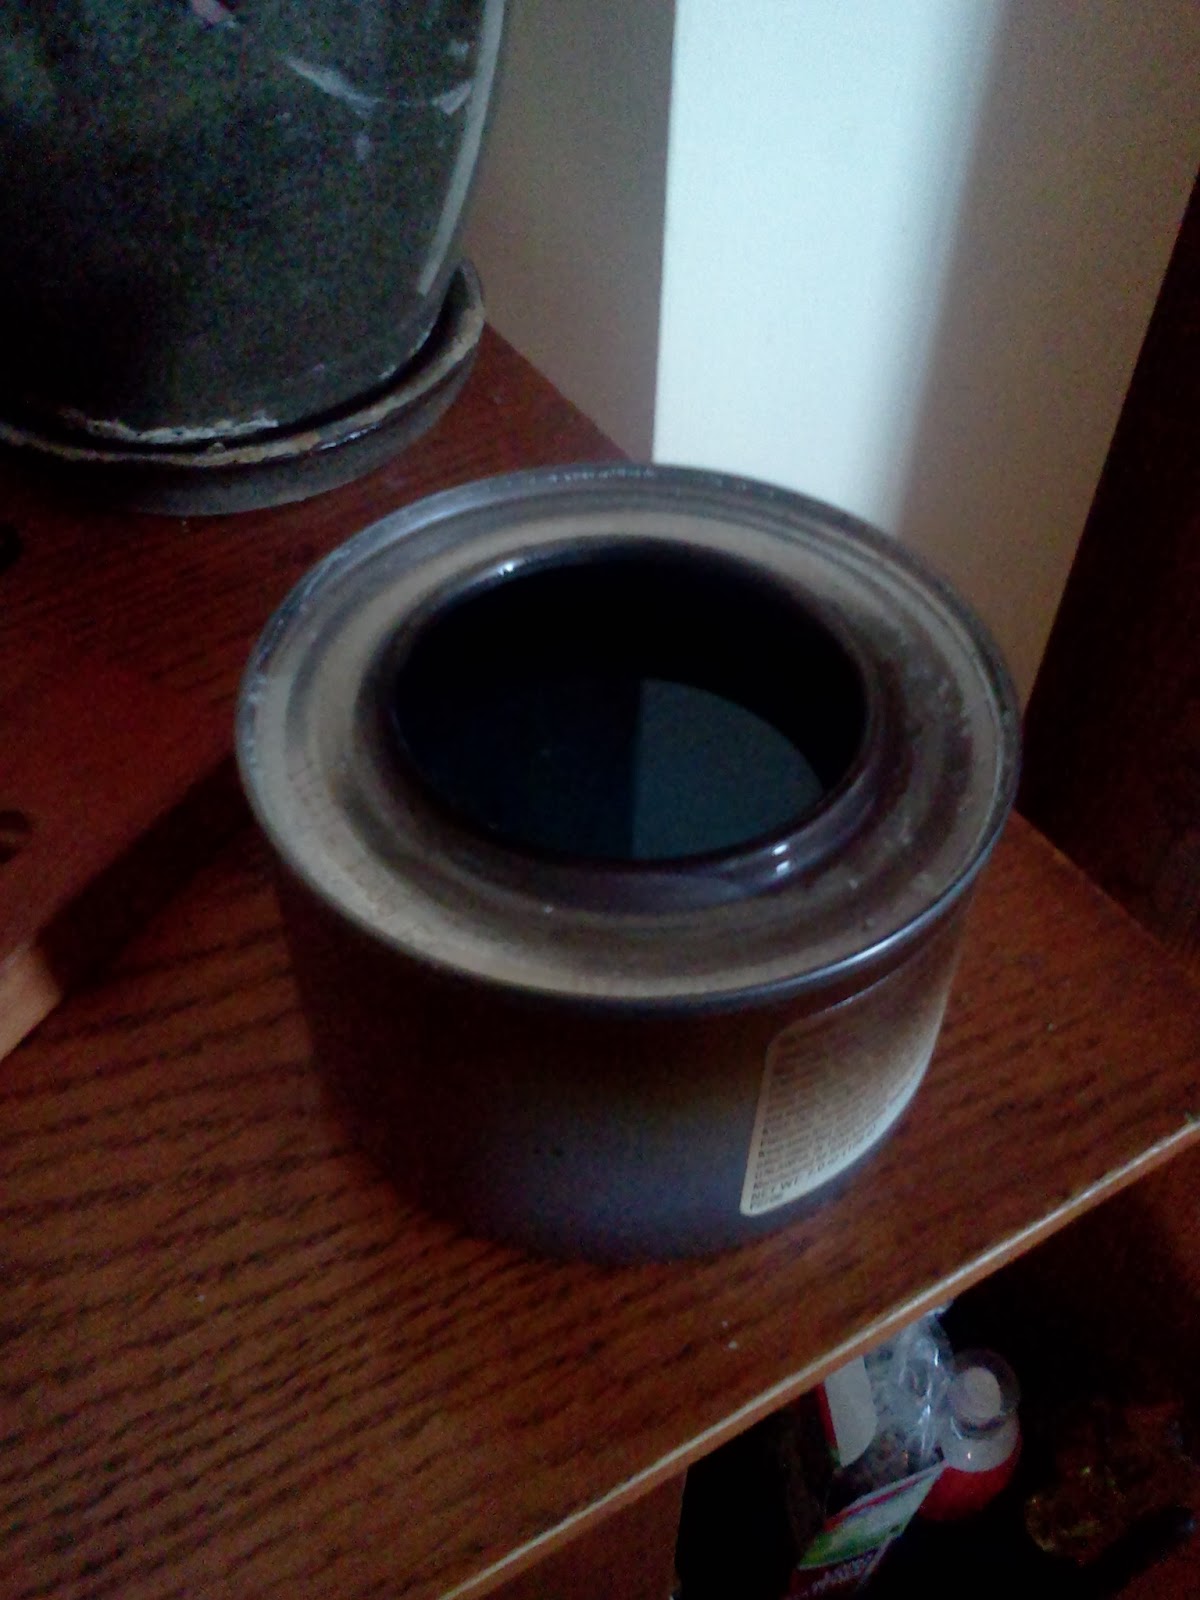
Homemade Gel Fuel

I received a wonderful gift from my sister to use her gel fuel fireplace for a while in my home.  I have secretly wanted a portable fireplace for the longest time, though I knew nearly nothing about them.

After a quick primer, I set about looking for an affordable gel fuel source and was disheartened they were so expensive, relatively speaking.  This was why my sister was willing to give it up for a while.  I experimented with some Sterno, similar to the gel fuels available- just not as high-flaming, to get a feel for the thing.  It is a bit intimidating to say the least.  However, after more research online, I found I could make my own gel fuel. All I could think was is it safe? Is it legal? Will I die trying?

I read and read and read about what the 'real' stuff was made of and realized it was the same and not any 'safer' per-se'.  I followed the directions found here. As fragile as most articles made the process sound, it actually worked exactly right the first time.  I was shocked and thrilled.

Here is what I did:
1-Rinsed and roasted 6 eggshells at 350 for 30 minutes, then pulverized in my blender
2-Added the powder to a loaf pan and added 5% vinegar to about 1/3 up the loaf pan, then stirred for a while to get the reaction going.  I did this occassionally over an hour or so. I then let it rest overnight undisturbed.  In the morning, I dehydated this in the oven at 355* for 40 min (was making breakfast at the time in the oven), then opened the door another 30 (which wasn't working as fast), then closed it another 30 minutes to concentrate it to 1/4 the original depth.  There was white crusting along the top original edge.
3-I strained this through a napkin and sifter to remove the solids and let the liquid cool for 30 min.

4-I measured this remaining liquid (1/3 c) and placed it in a plastic bowl. I measured 9 parts 91% isopropyl alcohol and added this to the bowl. I stirred and added 2 drops blue food coloring, in order to see it better in containers and for possible spills.
5-I was undecided about the safety of adding the vegetable oil yet, so I dug out my essential oils; the mixture was already gelling in the bowl. I put in 4-5 drops of cinnamon, cedarwood, and juniper, figuring that it might be enough to elicit the crackling.  It did not give off a smell, but did cover over the alcohol smell some.
6-I poured this into used sterno cans. It gelled randomly and was watery everywhere else as I was pouring. I forgot to add the salt or borax for flame color, so I just sprinkled some table salt on top and moved it a bit around with a chop stick. The mixture re-gelled in a few minutes.

6-I lit one for a test. It burned without a 'whump' and immediately with a bright white/yellow flame.  It flickered nicely and produced a 5 inch flame.  When I lit 3 in a row, it made a very nice real looking fire behind the fake log.  The flames joined over the middle and grew to 7-9 inches at times.  This was enough to convince me to leave it at 2 cans at most.  I did not burn them fully today, but they should last 2.5-3 hours.
7-after snuffing and cooling for 15 minutes, the mixture remained fluid.  I am leaving one uncovered to see if it will re-gel better covered, uncovered, or at all, after burning. Will post update next time.

Some things I will do differently:
1-add oils, color, scent immediately, then pour while liquid to set undisturbed in cans.
2-burn only 2 cans at a time for flame height/heat reasons
3-add more scent and maybe experiment with additional vegetable oil for crackle.  There was some sizzle noises 10 min into the burn.
4-definitely use a bigger snuffer- NOT the sterno covers.  I will use a large mason jar lid or purchase a sterno snuffer online.  Using plyers was awkward and I dropped the lids in the back or on the side multiple times, due to the size and heat of the flames.  NOT good in an emergency.

This product was EASY to make, just a little time consuming.  However, the store bought product retails for $3-$4 a can.  Mine cost MAYBE $1.75 for 3 cans and most items were already on hand.

NOTE: Another noteworthy product was an aeresol can of extinguisher from walmart, on same shelf as the regular red canisters. It was cheaper than buying an additional conventional extinguisher, yet it was advertised to spray longer than the 2 leading ones by almost 2/3 time.

Monday, February 3, 2014

Baby Food Maker

I had a moment of nostalgia in Walmart yesterday doing my research job. I ran across this item from Nuk that reminded me of a similar item I received when my youngest was a baby. I was just beginning to spread my wings from the uncomfortable mold that the market placed on new mothers; it stated we only had store bought options to rely on to feed our children.  If we had any doubts about the sources they used or the quality of the ingredients, our only option appeared to be to brand-hop.  I was starting to use my blender to process simple fruits and cooked vegetables on my own, but it was hard to do in smaller batches.  Not a problem though, since this was also about the time I discovered month-ahead meals anyway.  However, this little item found its way into my hands, and I was thrilled to be able to take a spoonful of whatever meal I had prepared and put it through the mill.  It was not the awful gelatinous consistency of processed baby food (how DO they get food to resemble nothing of what it once was, and look like everything else aside from color, anyway?)  It was ground, real food that I knew the origins of.  I LOVED this item and the kid did too. 

Thursday, January 23, 2014

Sports equipment rentals!

I found myself at Eastern Mountain Sports in the local mall yesterday.  Over the course of conversation with the staff, I found out that they rent snowshoes ($15/day), x-country skis, tents, packs, kayaks, etc. They also have occassional excursions in regional country areas to learn how to do things like mountain climbing with guides and equipment. Now there's no excuse for you NOT to get outside, even in these temps (below 0 here) and IF you can unbury yourself, New England.  I believe other sports equipment stores may also offer similar options, if you are not in this area or cannot find an Eastern Mountain Sports near you. Give them a call first, its warmer :)

Saturday, October 19, 2013

Budgeting Software

I know I mentioned this somewhere, or I meant to-silly Lyme or old age, whatever.  Anyway, I have used the same $9.99 budgeting software on clearance for $5.00 for at least 15 years.  It made it through all the computer upgrades up to Vista then wouldn't work anymore.  After hours of desperately searching for any patch, user fix, update, or new version of this software (Home Budget for Dummies by Anuman Interactive), I gave up and sadly went in search of something else to take its place. With much trepidation, I looked and tried many free online versions of budgeting software made by wonderful and generous individuals.  However, because our income fluctuates greatly with all my random jobs, I really needed (and have come to rely on) the ability to see a forecast graph to show possible red dips in our income or bills over the year.  I like to plan way ahead for gifts, trips, or high ticket repair items, and this allows me to 'dream' budget.  Beside this vital function, I also needed to be able to input my data into a monthly calendar-like format to balance bill paying dates according to that same fluctuating income.  I never knew the goldmine I was offered with my age-old software, and almost gave up the search, until I found online-based  Calendar Budget.  Needless to say, I was thrilled when it had all the same functions and more, including my oft-pined for feature of downloading bank transactions directly into the program.  I have not run into any bugs yet, except of my own making, when I re-title an expense or something sloppily. When this happens, it kindly lets me know where I went wrong and I can fix what I will inevitably do.  I have mixed feelings about it being an online-based program as opposed to housed on my computer.  Online-based allows me to login and do finances from anywhere and saves my data if my computer crashes; this is a once every 5 year issue with us. Otherwise, I am hoping my data is safe.  Since I download bank transactions to a computer, save there, then upload, I assume my actual bank info is safe.  If someone really wants to know how much I spend on groceries or gas, that point really doesn't alarm me and maybe it would induce a donation, lol.  All in all, it is a free program/service that is feature-rich and well worth recommending!

Friday, August 30, 2013

Probiotics

During Lyme treatment, I was put on an antibiotic. I am easily susceptible to yeast infections, so I started eating high quality yogurt every day. This was ok, but not enough. Hubby purchased Ultraflora for me and I took this 3 hours after the antibiotic. This was better but despite an almost gluten free diet, the yeast was still an issue. I noticed this mostly first thing in the morning, so I added a cheap version of probiotic at night as well. This worked better and I have continued this for weeks following the antibiotic to ensure a healthy repopulation of good bacteria. Using an opened capsule topically, mixed with water to a loose paste, was a great one-time alternative to the creams out there.

Monday, July 22, 2013

Top 10 Mud Run Tips

We accomplished a very fun day doing the Dirty Girl Mud Run and all the training we did came in very handy.  Not all mud runs are created equal and this one was by far the easiest, however, there were some things that either did help out a lot or would have been a great idea... 

1. Consider wearing leggings or knee pads under the leggings to protect your legs/knees when crawling through obstacles.  Some of the crawling was just mushy mud, but some was definitely coated in gravel.

2. Unless you want to be dripping mud down your clothing, even after you rinse off, do not dunk you head if at all possible.

3. Do not bring bottled water with you to save time at the rinse station.  We never used it and carried around 3 gallons in my gym bag all day for nothing. 

4.  Wear clothes you do not care about and can ditch right after or be ready to spend some time hand scrubbing with a terrific stain remover:
       1/2 blue original dawn dish detergent (I don't usually use many things with man made chemicals, but this one works!) mixed with 1/2 hydrogen peroxide. Most people clean their 'mud duds' right when they get home, but we were visiting relatives out of town for another 2 days and didn't want to clog up their machine.  So, they sat in a humid car in a musty garbage bag until we got home.  I hosed everything off as well as I could, and this took considerable time.  Then I soaked them in a tub for 1 day in water, another day in water and some stain remover solution, then went at it scrubbing on the third day.  They are not new looking, but presentable considering what happened to them!

5. Use shoes you can donate at the end of the race for the same reason and check off a good deed.

6. At the rinse station, strip off to your underwear (its all girls at this one) and bring a bar of soap.  You'll have to be quick to ward off the evil eyes as its meant to be a quick rinse, but the soap will shave quite a few minutes off your rinse.

7. Bring someone along to take pictures and video of the race... you'll preserve some great moments!

8. On that note... Smile, jump, wave, be silly and strike a pose at every obstacle... there appeared to be hidden professional photographers or cameras set up at each one.  Really wished we had hammed it up a tad more now:) Be sure to wipe off your runner tag each time you get muddy; its the only way they can tag you later and you can find your pictures!

9. Tie your shoes on snugly, as you WILL lose them on the first deep pit if you don't!

10. Tie something wacky on your bag like you would do for luggage at an airport.  It makes finding your black duffle bag MUCH faster amidst everyone else's black duffle bags!

Bonus... if they give you a promo tshirt (and especially if it's white.. put it into a plastic bag and leave it till you get home.  DO NOT wear it thinking you are clean after the rinse station.  You are NOT! lol!)

Tuesday, July 9, 2013

Mud run training

For my first mud run, I'm doing the 'wimpy' one with the inflatables, among other things as opposed to fire pits and barbed wire (not off the table for next year, though!)  Because I' ve never been able to run across the street, never mind in a race...it was a lofty goal, but I wanted to celebrate my twins 16th and my fitness comeback with something that we could do together and have fun doing it.  Sis and I started at the gym nearly daily since late March doing the elliptical and treadmill, working up our pace and endurance. We tried to attend a bootcamp class twice a week,but it didn't always work with our schedule, so the last few weeks we added regular abs and arms. I lost gym time for the 3 weeks leading up to the race due to work, so I added trail running (with walking when I couldnt run anymore). This added experience with terrain, weather, and humidity.  I was shocked to find a new love in trail running;  it's not hard on the knees and it's so much more enjoyable than the road or staring at a treadmill...30 min literally disappears! Today it was pouring, but we're doing a mud run no matter the weather, so we went anyway. 
Positives:
  • Running in the rain gives you more mileage on much less effort. 
  • Kids get downright giddy getting soaked to the bone and sloshing through mud and deep puddles with permission. 
  • Shower is optional after.
  • My $2 clip on camera case that I use as a wallet and phone holder actually was waterproof in the end.
  • There are no bugs when it rains.
Negatives:

  • If you trail run without bug spray when it's not raining, you cannot stop, ever.
  • If you don't want your car soaked for a couple days, plan ahead and bring towels.
  • If you don't want to be blind most of the time,wear a baseball hat or swim goggles.
  • Flash flooding on trails makes navigating roots, rocks, and sticks impossible, as well as running.
  • Feminine protection of any external kind gets waterlogged, grows to 5X it's original size, and feels like a diaper.

Lessons learned. Now that I'm  dry, I'm going to add a tip from another runner, situps and pushups, 3 sets each to failure. With a few days left, I'm giving it all she' got, Captain! What do you do to train for an event?

Monday, July 1, 2013

Skunks

What we thought was an abandoned baby skunk living under our shed turned into at least 6 baby skunks who really liked our yard.  I love animals and don't really mind the nocturnal kind that keep to themselves, but I love my kids more and the many friends that gather at my house.  Since these guys were quite comfortable stumbling around during the day, testing their natural abilities, we had to evict them.  It was the kinder choice since the nuisance guy would not only charge us $50 each, he would have to euthanize them  because no relocation area was available.   Needless to say, I got digging around the internet.  Thankfully, the first and least invasive appears to have worked...playing loud music in the shed 24/7.  However, your visitors may not be so accommodating, so you may want to trap and relocate, put mothballs in the area, or soak rags in ammonia around the den area, place motion sensor flood lights near the den, place flour at the mouth of the den and when the tracks show they've left for the night, block up holes with stone or buried chicken wire because they will dig. Last option is to humanely shoot them if local laws and your conscience allows. If you use mothballs or ammonia, do not let children or pets near the area!

Saturday, June 15, 2013

Balloons!!!!

After trying to purchase balloons for my oldest's 16th a while back, I was modified at the cost of 16 latex balloons at my local supermarket.  This year, I thought id be smarter for my twins' 16th and get the tank at my local warehouse store, which halved the price.  Today, I found a better deal at 5 Below.  Foil filled balloons were $1 each and latex 3 for $2.  If I remember correctly, the Dollar store offers something similar.

Tuesday, June 4, 2013

Customer reviews

I love consumer reports, but they tend to be so glossy and 'big corp' looking that their trust value in my eyes is not top notch. I tend to rely on amazon reviews or just plug in 'customer reviews' and add the item I'm looking for, to get some unbiased feedback. However, I just found a neat site while looking for a label maker...they cover electronics, home, garden, kitchen, food, and many other interesting categories to help you find what you need...check it out at www.consumersearch.com

Saturday, April 20, 2013

What Works- Wild Foraging, YUM!

Here's where I may lose a few of you to my weirdness.  I love all things natural and I have always been interested in wild edibles. However, I have been tempered by a healthy sense of fear and the chance I would poison myself, or worse, my family.

Today, I was overwhelmed with curiosity as I found so many tender shoots and leaves coming up around my yard that I HAD to try it. I already knew about burdock and dandelion and collected those.  I looked up a list online of more I could try, like violet leaves and chicory.  I have a plethora of 2 other kinds of 'weeds' that I would LOVE to start eating, but do not know what they are yet.  If anything, it would reduce the sheer quantity around my yard.  Those are yet to be researched, but I will do it with glee.

In my little adventure, I found a site that was a goldmine of information.  It is here...  It covers so many kinds of plants, flowers, and cooking methods.  They have online classes and youtube videos, as well. I'm DYING to try some of his acorn ideas! And noting that all North American grass seeds are edible makes me want to try to add them to flour for bread or pancakes, or cook in oatmeal, etc.  Oh boy, this site is dangerous to me, lol.

Back to my foraging... I took all my greens, cleaned them of random grass blades and old leaves, soaked them in cold salted water in case there were hitchhikers, rinsed well, and steamed in the microwave.  We were going to eat a quick meal of ramen noodles today, so I added my greens and 1/4 c shredded mozzarella cheese to the noodles.  They were good! They tasted a lot like spinach and collard greens, but fresher and 'greener.' Needless to say, they camouflaged ramen into something that appeared and tasted healthy :)

Caution: Do NOT eat anything unless you are completely sure of its identification.  There are copycat weeds that grow near edibles and it would be good to take a wild edible class or two, read books, and watch more you tube videos until you are very confident that what you are picking is the real thing.  Also, double and triple check the sources.  Some sites have conflicts with others regarding the edible parts or status of certain plants.  You could always check with your local cooperative extension office for advice and identification help as well.

Wednesday, April 17, 2013

Kitchen essentials.... really basic equipment

Talking about equipment in the kitchen for people just starting out or wishing to pare down, we could all disagree about what is necessary, but since I am the one blogging, I'll share what is in my drawers and cupboards :)  The basic food list will follow in another post. I have other posts that shared specific equipment that are shining stars, but this is a 'staples' list.

Fist I'll start with 'Can't live without.' **disclaimer: I am NOT talking about a survival/emergency situation for those who might be ready to jump on me about being frivolous ;) ... we could all work with aluminum foil, a sharp knife, and a sanitized stick for most things in that situation. Also, remember I have a large family to feed, so my list may require more things than yours. I am sure I missed some things, so this list may morph a little over time...

Baking-
Measuring cups/spoons (Nothing fancy- dollar store plastic does the same job as stainless)
Fork for whipping or as a simple pastry blender
Bread pans can be used for baking bread, vegetables, meatloaf, small roasts (stainless or glass last longer, aluminum is cheaper, but hazardous to your health)
9X13 can be used for casseroles, large roasts, poultry (I have one ceramic and one glass- both work great and release stuck on food well in cleanup)
Large bowl (My favorites are a very large stainless one I use for mixing everything including food and natural detergent- see other posts... the other is a large plastic Rubbermaid type with a lid for serving/storing salad or bread dough)
Large spoon for mixing/serving/measuring
Sharp knife for prep/serving/measuring/peeling
Strong hands and arms for kneading/blending (since a Kitchen Aide blender is NOT on the necessary list. Don't worry, if you don't have them yet, you will)
Potholder or dishtowel for hot pans
Cookie sheet for toast, bread loaves/cookies/breadcrumbs/dehydrating
Rolling pin or something with round sides like a can of vegetables

Cooking-
Pasta pot with cover (stainless steel chef-ware type pots last forever and through many 'burnt on' projects... I know this from experience)
Saucepan with cover (I've had the same one for my whole marriage of almost 22 years, and it was second hand- makes coffee/hot cocoa as well as sauce, etc)
Frying pan (cast iron is my favorite, my other favorite was a chef-type that finally broke a handle after 20 years-makes skillet bread/desserts as well as frying foods)
Sharp knife (from above) prep and serving
Large fork for lifting roasts or stirring/separating pasta
Large spoon from above for stirring sauces
Baking pans/mixing bowls as listed above
Potholder or dishtowel from above
Meat thermometer
Can opener

Serving-
Large mixing bowls from above
Pans from above
Large fork, spoon, and knife from above
Potholders from above for the table if food is coming from the oven

Cleanup-
Soap (grated pure soap works is multiuse for body and sink)
Dishrags made from anything- cut down old towels or facecloths are fine (reusable saves money)
Onion bags or aluminum foil (use as pot scrubbers (do not use foil on fine surfaces)
Baking soda for soaking/scrubbing
Vinegar for degreaser to add to sink or for soaking

Not so basic, but nice to add...
Pastry blender (pastry blender is faster and works for meatloaf as well as pie crust if the blades are 1/4" or more thick vertically)
Hand mixer
Manual chopper or blender
Toaster for smaller servings
Sponges with scrubber side
Bottle brush
Candy thermometer
Microwave
Colander
Muffin pan
Rolling pin
Cooling rack
Peeler

Tuesday, April 9, 2013

What works in the garden

My favorite spot is the garden.  There are so many things that can be done here free or cheap, believe me, I know. 

A couple years ago, I got the homesteading bug. My kids called me Amish, it was so bad.  Some days, it still is, and they still call me Amish.  I put everyone to work hand sawing and nailing old boards into raised beds.  (Hubby wasn't home and I didn't know how to work the circular saw.)  Also, I couldn't find the wood saw, so we ended up using a metal saw.  It was tough work, but it did work!  However, there is something to be said for the right tool for the right job, lol.  Anyway, the first year, we ended up with some pretty nice raised beds and used the rocks from digging and leveling the ground to border the edges. Donated fencing was used around it, but I splurged on mulch as a reward for all that digging!


This year, I wanted to add a few more beds, but save some labor.  Since we broke a couple of dressers during the winter, we used the rest of the drawers as premade raised beds after the boys drilled holes in the bottoms. (Make sure to use real wood, not pressed or treated board.) It is best to set them out in the fall and use leaves and other raked debris to fill and break down over the season.  By spring, the compost will decompose and you will have a good start of soil mix to plant in.  My drawers never made it out last winter, so I used all my clippings from clean up this weekend to fill them.  I will mix this with potting soil and keep refilling it with compost over the growing season as it breaks down. I do this every year in the raised beds pictured above and they work fantastic. 
 
Hollow concrete cinder blocks make great planters as well as a raised bed edge in place of boards (or drawers!)  I will use 6 of them to plant green beans that will climb over a hog panel.  This is going to act as a trellis when placed on its end with one side bent to sit under my porch edge.  It's easy picking beans when they can hang down overhead.
 
Old mini or venetian blinds work well when cut to size and used as plant/seed markers in the ground.  Use permanent marker and take in after the growing season or the writing will fade with the snow. 
 
Cut up pantyhose or knee highs work terrific as plant ties as they give a little without harming the plants. 
 
Cardboard pizza boxes and newspaper work wonders to start new beds or kill weeds in larger areas. 
Place the cardboard over the area and weigh it down for the winter season.  I even started new flower beds over established lawn by covering the area with layers of newspaper, wetting it down well and allowing it to kill the grass off.  You can wait for this to happen over a season or use it right away.  Just dig holes through the newspaper and ground beneath, then tuck the plants in.  Finish by placing mulch over the newspaper.  Last year, I had tall perennials (involuntary spilling over from my neighbor) growing in the area I wanted to plant in this year.  I cut them all down to the ground as best as possible, but because they left a couple inches of stubborn and sharp stalks, I placed cut-open black plastic garbage bags over the whole area. I was at a loss what to keep it down with though, when I remembered all the mason jars my friends gave to me.  They held it all in place most of the summer until I could rake leaves and other yard debris over it in the fall.  By planting time, I should be able to remove the plastic out from under it and turn the soil.
 
Conservation centers, colleges, and County Extension offices usually offer soil testing to see if your area is safe to grow in, better suited for other kinds of plants, or missing critical nutrients.  If you are not doing raised beds or making your own soil mix from scratch, then testing your ground is an important step.  It is cheap to do, usually $10-15 a sample, and easy.  They usually instruct you to dig about 8 inches down for vegetables and collect samples from 8-15 areas within the area you want tested.  I took this pile of samples, mixed it together, took out a couple cups of it and dried it on newspaper for a day.  Then we mailed it in a plastic sealable bag with the appropriate form, and of course, the fee.  They send the results back within a week or two. 
 
I mentioned this before, but your compost pile and beds will benefit if your kids have any small pets that do not eat meat.  It counts as the dry component, especially if you use shredded office paper like we do.  Rat, hamster, rabbit, mouse, bird, and guinea pig litter can be applied directly without aging right onto your beds, as well as chicken poo.  Use caution when using bird litter as the uneaten seeds will probably offer a few volunteers in your garden. 

Friday, March 29, 2013

What works- Fitness

My journey has evolved from couch potato to gentle yoga lover to gym rat in just 3 short months.  I never thought I'd be one of those, but a nudge from dear sis-in-law was enough to get us both there daily.  For anyone who has yet to make the immense effort to begin their journey, I understand! I think it's harder to start than to stay going... something about momentum.  This is why we go daily.  If we take a day off because we are sore (not injured) or tired or deserve a day off, we know we will begin the downward slide back onto the couch cushion.  Neither of us want that, can afford that, or deserve that.  As much as it scared us to take the leap, we found that 2 weeks passed by very quickly and we are well on our way to developing a new lifelong healthy habit. I have surprised myself daily to find my limits are mostly imagined and I am able do more than I ever gave myself credit for. I am not promoting joining a gym, because I know not everyone can do that, but if you can get a workout, walking, or healthy eating buddy, there is so much more energy added and staying power is multiplied.

Music!  Oh the joy of music!  Use a mp3 player, plug in to Pandora, or turn on the radio to set the pace faster than you would pace yourself and make the time go by so much faster. Without music, I found I was concentrating on the wall in front of me, to the random numbers on the equipment, and especially the clock.  It would tick tortuously slowly.  Today, sis and I plugged into Pandora with a splitter and laughed the hour away listening to 80's cardio; oh the memories!  Definitely helped us go faster, push harder, and we added a good 30 minutes to our usual routine easily.  It also works in the opposite direction for cool downs and stretching/yoga to slow down and breathe deeply as you ease into your day or slip into bed.

Workouts don't come without a price (and so many rewards), but the price is what you feel first.  Sore muscles and fatigue are normal and a part of the process.  Not a lovely part, but a part.  I tend to repeat Tom Sobal's saying over and over, especially after we started an Arms/Abs/Tush class twice a week: "Pain is weakness leaving the body."  Ps, you have to read his story- what a guy! http://sportsillustrated.cnn.com/vault/article/magazine/MAG1006053/1/index.htm  Anyway, I found an article of things to try when you get sore that may spark an "Aha" moment for you here... http://www.livestrong.com/article/422215-how-to-naturally-relieve-muscle-pain-from-working-out/

Variety is the spice of life and getting fit must include all the spokes of the wheel in varying degrees.  You will find that some will come easier than others: Eating better, sleeping well/long enough, giving the mind time to daydream/wind down, working up to a sweat and breathing hard (not asthmatic, just enough to know you are working hard), and endurance/strength exercises.  Also, this is probably part of the 'mind' part, but get out into nature at least once a week.  Hearing the sounds outdoors, getting some sunshine, and breathing fresh air does wonders. If you don't feel like you've gotten out of the old habits just yet, try to do each one of these things just once a week, and probably not all in one day ;)  In a month, you will be wanting more and the hard spokes will be easier.

I am going to say it again, yes again:l logging/journaling makes a huge difference between success and failure.  When you cannot see, in concrete numbers, the expense of what you are eating, the balance or imbalance of nutrients, or how much activity you are getting, you WILL lie to yourself about how good you've been, OR you will excuse yourself into bad habits. Let me go another degree and say that, if you have buddies doing it with you, and everyone accountable to everyone, you will behave better when things get tough. 

Lastly, my favorite excuse prior was not having enough money to do things 'right.'  But all of it can be done as simple and free as the outdoors for a long walk, or using gallon jugs/canned food/body weight for lifting..  If you are online reading this, there are millions of classes and videos here for free for anything under the sun.  I even learned Qigong and Tai Chi here at one point. You can find and learn any activity you feel like you can do- just be sure to use all your major areas upper and lower. There are online logging sites mentioned in my previous posts, and music here as well to wind up or down with.  If you have trouble sleeping, two tricks sis and I talked about this week were to count down from 300 by 3's (worked for me the other day in 20 counts flat) and breathing deep in and out for a count of 2, then 3, then 4... up to 20.  The eating part, well, you decide what you will trade up for this week, water instead of soda?  Wheat instead of white? Fruit instead of cookies? You get the drift...

Saturday, March 23, 2013

What works- Automotive

We've had our share of issues with used cars over the last few years.  This led us to purchase an extended warranty on the car before this one, as our transmission died on the one before that!  It was quite an added expense, but it was our first used car and we didn't want to take any more chances.  Sooner than later, we had electrical issues and lock issues that the warranty covered.  We also had some issues that the warranty did not cover; $1000 of uncovered expenses that were not only downright inconvenient, but threatened to leave us on the roadside.  This brought us to our next purchase. Though we were hesitant to spend that kind of money again and not use it, the thought of something really big going bust was enough to convince us to do it.  Some of my family thought we were ripped off, but I'll tell you what happened next.  Within a year, our transmission went unexpectedly, again.  It went into the shop, and the warranty covered a 'reconditioned' transmission and a rental until it was repaired.  This took 2 weeks longer than expected, but we loved having an almost new van (and less miles added our old van) while we waited.  After, we were very grateful to have the van back and repaired for free, but that wasn't the end of the story.  I never got home from picking up the van before the engine light went on again. I brought it back and they couldn't figure out what was wrong.  They made some adjustments, and again the light came back on a few days later.  This time, they found shavings in the pan, which anyone will tell you is NOT good.  They made us see the dealership this time.  The dealership got us another rental and kept our van for many weeks after this.  Come to find out, they went through 3 more 'reconditioned' transmissions with the same result.  Finally, they bit the bullet and gave us a brand new transmission!  The extended warranty was paid for almost 5 times over when it was all said and done, and we have a practically new van under the hood that may actually last us beyond the last payment this time.

Rainex works wonders on your windows, but do not get it on anything else!  It leaked in my car and ended up eating through the box and the plastic bag it was kept in. 

Drygas is cheap and works fabulous for hard New England winters and keeping the engine humming.  Follow the directions for use.

Hang a plastic shopping bag on one of the arm rests between the front seats by one handle.  An easy access garbage comes in handy.

Make friends with a mechanic.  Find someone either related to you, related to someone you know, or a mechanic who values the business of someone you know.  The relationship ties will make it easier to find an honest technician who will advise you when you can put off repairs, find a cheaper option, or tell you the cold, hard facts.

AAA coverage is worth the money, even if you use it once.  One tow or unlock service will pay for itself.   Like the warranty, the peace of mind is also worth the money. Knowing if you get stranded somewhere- and it's never when you expect it- that someone can bail you out, without having to go through everyone on your contact list. With this membership comes lots of other perks as well, like free battery tests, discounts everywhere, and student coverage for free their first year.